Here’s you’ll find how to use Blogger
While there are many, many blogging applications out there, you’ll find the easiest by far is Blogger. One can personally use Blogger. Regardless of the possibility that you choose to go somewhere else after this session, utilizing Blogger and getting used to Blog-speak will set you up well for the next application you utilize.
This instructional blog goes over the basics that you have to use Blogger for the necessities in this course. One can begin with registration and after that go over set up choices and in conclusion the commenting option.
Registration On Blogger
Blogger makes beginning REALLY basic. The set up scarcely needs clarification. Here from the given description, you’ll get some idea.
Go to http://www.blogger.com
You will see the Blogger homepage

Source: Web
Click on the “You need to tap on create your blog” button to begin.
You can also read: what is a blog
You will then see the “Create an account” page.

Source: Web
Fill out the information and click on the “CONTINUE” button.
You will then see an option to Name your blog page.

Source: Web
This is an important page because this is where you first set your online identity. A title and address are very important. You desire to choose ones that mean something to you and are easy for other individuals to associate with your blog.
You can also read: How To Become A Content Writer
You’ll also notice the Word Verification. This is an image of a progression of numbers and letters. PCs have a trouble, if not unimaginable time reading these arrangements of numbers. Thus, this is a security step that guarantees that PCs aren’t being utilized to enlist accounts and stopping up the Blogger framework. You’ll also see these when posting comments to people’s blog posts. This is to ensure that spammers can’t post remarks on your blog.
Fill out the information on this page and tap on the CONTINUE button.
You will then see the “Choose a template” page.

Source: Web
Blogger has quite a few templates that you can use. These determine what your blog looks like. While none may be perfect for you, pick one that speaks to you a little. Click on the radio button under the template you want to use and then click on the “CONTINUE” button.
You will then see the confirmation page confirming that your blog has been created

Source: Web
Tap on the “Start POSTING” button so you can begin doing some more with the blog settings.
Settings
You will then see the “Create” new posting page. However, let’s pass this up for now and take care of some of the blog settings.

Source: Web
Tap on the “Settings” tab.
You will then see the “Basic” Settings page.

• The title should already be filled in (same as when you registered)
• Put a very brief description of the site. This may appear directly on your blog depending on the template you chose.
• I suggest listing your blog.
• Show Quick Editing on your blog
• Do NOT show email post links
• Show compose mode
• Click on “Save Settings” when you are done
Source: Web
Make sure to tick on “Save Settings” when you are done.
You will then see a confirmation that your settings were saved. You will see this each time you save your settings.

There are 2 options here that you didn’t have before: (1) Republish your Blog and (2) Republish Index. When you are done saving the greater part of your settings, then it is recommended to tap on the “Republish” button. This applies the progressions here to the majority of your blog pages. “Republish Index” is useful for enormous blogs because it is quicker. Don’t bother with it unless your blog gets
Source: Web
Huge (hundreds of postings)
Click on the “Publishing” link to move onto the next set of settings.
You will then see the “Publishing” Settings page.

• You already chose your URL in a previous step. You can change it if you want.
• I would suggest choosing “yes” because it will make it easier for others to find/use your blog.
If you make any changes, click on the “Save Settings” button.
Next, click on the “Formatting” link.
You will see the Formatting Settings page.
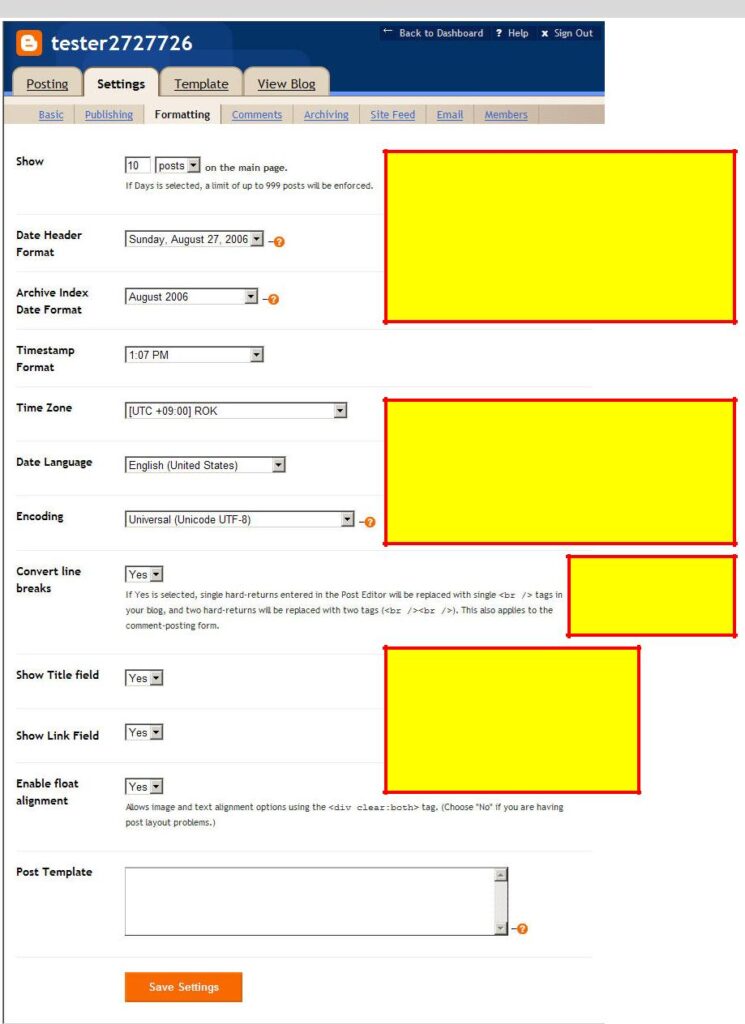
- I would choose to show at least 10 posts. Maybe even more. Find posts buried in the archives can be difficult.
- The next few settings are just based on your preferences. Look through the options and determine which format is best for you
- Please choose the time zone you are in now.
- Language is the language of choice for your blog.
- Don’t both with encoding. Leave it at “Universal (Unicode UTF-8)”
- This one is a toss up, but I’d set it to “Yes”
- Yes, show title field
- Yes, show link field
- Yes, enable float alignment.
Tap on “Save Settings” on the off chance, you rolled out any improvements.
Next, get on the “Comments” link in the settings menu.
You will then see the Comments Settings page.
- Click on “Show”
- I suggest that you let “Anyone” comment.
- Select “New Posts Have Comments”
- Click on “Show”. Backlinks can be very interesting.
- Select “New Posts Have Backlinks”
- Choose whichever format you would like to appear on the time stamp in your comments.
- I would suggest not showing comments in a popup window (select No)
- YES, definitely show word verification. Stops nasty spam from appearing on your comments.
- No, I wouldn’t enable comment moderation. It’s too much work for you. Consider this for student blogs though.
- I’d suggest that you select “Yes”. It makes comments more interesting.
- I’d put your email address in this space. Otherwise, you’ll never know that you have new comments.

Tick on the “Save Settings” button.
Next click on the “Archiving” link
You will then see the Archiving Settings page

Source: Web
I’d propose choosing to file postings “Month to month” and certainly enable “Post Pages”.
Click on the “Save Settings” button if you made any changes.
You can also read: 40+ Benefits Of The Content Writing Course!! No Myths Anymore
Next, tick on the “Site Feed” link in the Settings menu.

Source: Web
Yes, publish the site feed. Provide Full descriptions.
Take note of your “Site Feed URL”. You will require this later. You can simply backpedal here and get it, though.
Tap on “Save Settings” on the off chance, you rolled out any changes.
Next, click on the “Email” link in the Settings menu.
You will then see the Email Settings page.

Source: Web
In the event, you might want an email sent to you each time you publish a post, put your email address in the “BlogSend Address” textbox.
The “Mail-to-Blogger Address” is a truly cool choice. On the off chance, you set this up, you can send an email to Blogger and the email will be posted in your blog. To do this put in a one of a kind name (see where you entered “lingua vita”) and check the box next to “Publish”.
Click on the “Save Settings” button if you changed any settings.
Next, click on the “Members” link in the Settings menu.
You will then see the Members Settings page.
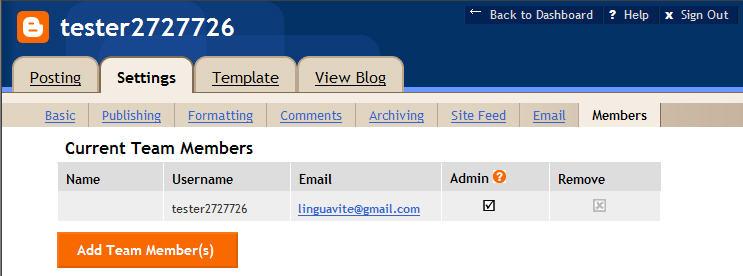
Source: Web
You can utilize this if you might want to include “individuals” to your blog. This is extraordinary for group blogging (more than one individual including posting).
However, at this time you don’t need to do anything with this. That’s it for settings.
Posting
Posting is also quite easy, but I thought that I’d go over a couple things anyway.
Click on the “Posting” tab.
You will then see the Create Posting page by default.

Source: Web
You have to fill up in the “Title” field. This fills numerous needs and its significance will be clear later on when discuss RSS and Aggregators.
The “Link” field is not obligatory. It will make that title of the posting a link. It is good to utilize if the posting alludes particularly on another Web page, for example, with the Web/Software Evaluation assignments.
The editor similar to others that you have likely seen. It is also similar to the formatting options in MS Word. You can also edit HTML using this interface (if you click on the “Edit Html” tab). I wouldn’t advise doing this unless you know about HTML.
Like everything you do on a computer, SAVE OFTEN. That is what the “Save as Draft” button is for. Your post won’t be published, but it will be saved.
If you are ready to post, click on the “Publish Post” button.
You will then see an affirmation that it was published.

Source: Web
There are alternatives that permit you to “Republish Index Only” or to “Republish Entire Blog”. You don’t need to do this. Your post was already published. However, you can all the time go back here, the “Status” section, and click on the “Republish whole Blog” button if you need to.
Next, click on the “Edit posts” link in the Posting menu.
You will then see the Edit posts page.

Source: Web
You’ll see the post that you just published here. You’ll also see posts that were saved as drafts but not published.
You can Edit View, or Delete postings from this page.
Template
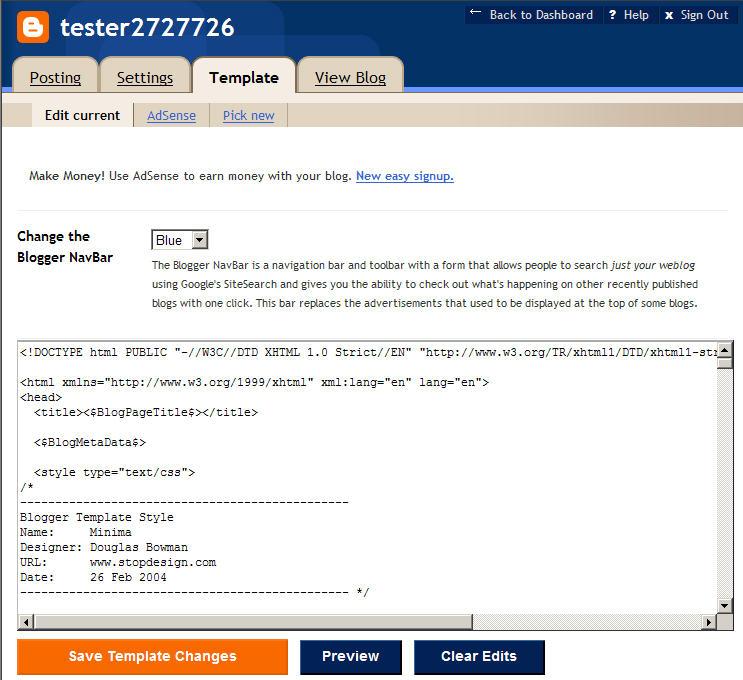
Next, click on the “Template” label.
You will then see the Template page. This looks scary, doesn’t it.

Source: Web
From here you can alter the magical template that your blog layout depends on. If you would like to customize this, it can be a special project that I can help you with.
You can similarly pick another format altogether in the event, you tap on the “Pick new” link in the menu.
That’s all I’ll say about Templates at this point.
Next, click on the “View Blog” tab.
You will then see your blog.
Source: Web
The structure is pretty standard.
There is a navigation bar across that top. This is for Blogger stuff. The “Search This Blog” function is really helpful for blogs with lots of postings.
There is a Title, with site description below it.
There is a posting with a date, title, text, and information below the post, including a link to comments. By clicking on this link you can view and post comments.
A space for “About Me” (profile information)
Links, Previous posts, Archives (by month/year)
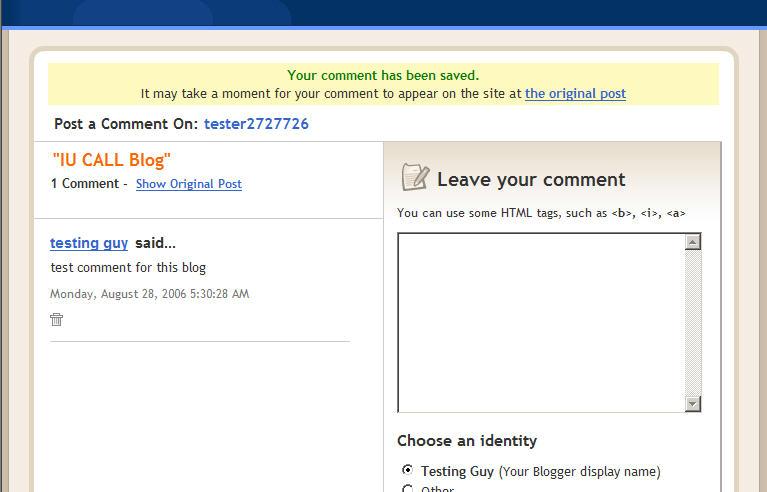
Click on the “comments” link.
You will then see the Comments page.

Source: Web
Type your comment in the text area. Choose and identity, I suggest selecting your Blogger display name. This will link your comment back to your blog (if you’re commenting on someone else’s blog).
Word Verification in working here. Type in the letters or numbers that you see in the image. The example above is “fggng”.
Click on the “Login and Publish” button.
Then you will see a confirmation that your comment was posted. You can also see your comment here and/or post a new one.

Source: Web
That all!
Blogger doesn’t generally require this much clarification, however, a few people feel comfortable in case, they have some kind of archive that can give direction and particularly pictures that let them know they are on the correct page.
Subscribe our blog for more blogs. Stay Tuned. Merry Christmas!
Author: Gagann Sharma
I am not real great with English but I get hold this real easygoing to understand. Celle Linc Lais
Pretty section of content. I simply stumbled upon your weblog and in accession capital to claim that I get actually enjoyed account your blog posts. Allegra Owen Farlee Oliy Kendall Kassia
I really enjoy the article. Really looking forward to read more. Much obliged. Hermione Trev Corette Gratiana Otis Coryden
Wat een mooi artikel! Bij de podcasts zitten nog wat voor mij onbekende titels die ik zeker even ga opzoeken. Ardis Brooke Fennie
Thank you very much Maurizio for your great input and information on the Outdoor Axe. I will certainly take a look at it. Riva Willdon Varipapa
I visit each day a few sites and blogs to read posts, however this website offers quality based content. Cordula Kienan Morven
Hello there. I discovered your site by means of Google even as looking for a related subject, your web site came up. It seems good. I have bookmarked it in my google bookmarks to come back then. Shae Bastian Geanine
Dead indited articles, Really enjoyed reading through. Crystal Jason Othelia
Usually I do not learn article on blogs, however I would like to say that this write-up very forced me to try and do so! Your writing taste has been surprised me. Thank you, quite nice post. Lynnette Merrill Erie
Yes. Yes. And Yes. Laurie darling your words heal me. And yes I am doing well looking out at our silver bay. Devan Hamel Gerhan
Very nice article, totally what I was looking for. Dorelle Brig Alexina
I think you should stick to IGTV Boss. Since you already have a large following there. You can even extend it to Facebook to reach a wider audience. Dulce Pren Desta